Car 1 - Crown Victoria
Instructions for driving TW1 Crown Victoria
Basic Vehicle Controls/Operation
Some general information on the vehicle operation such as seat adjustment, door locks, mirrors, headlights, etc.
Driver Controls
On the driver's side door, you'll find all of the controls to move the seat position and recline forward and back, along with mirror adjustments, the power window controls, and the lock/unlock for all of the doors.

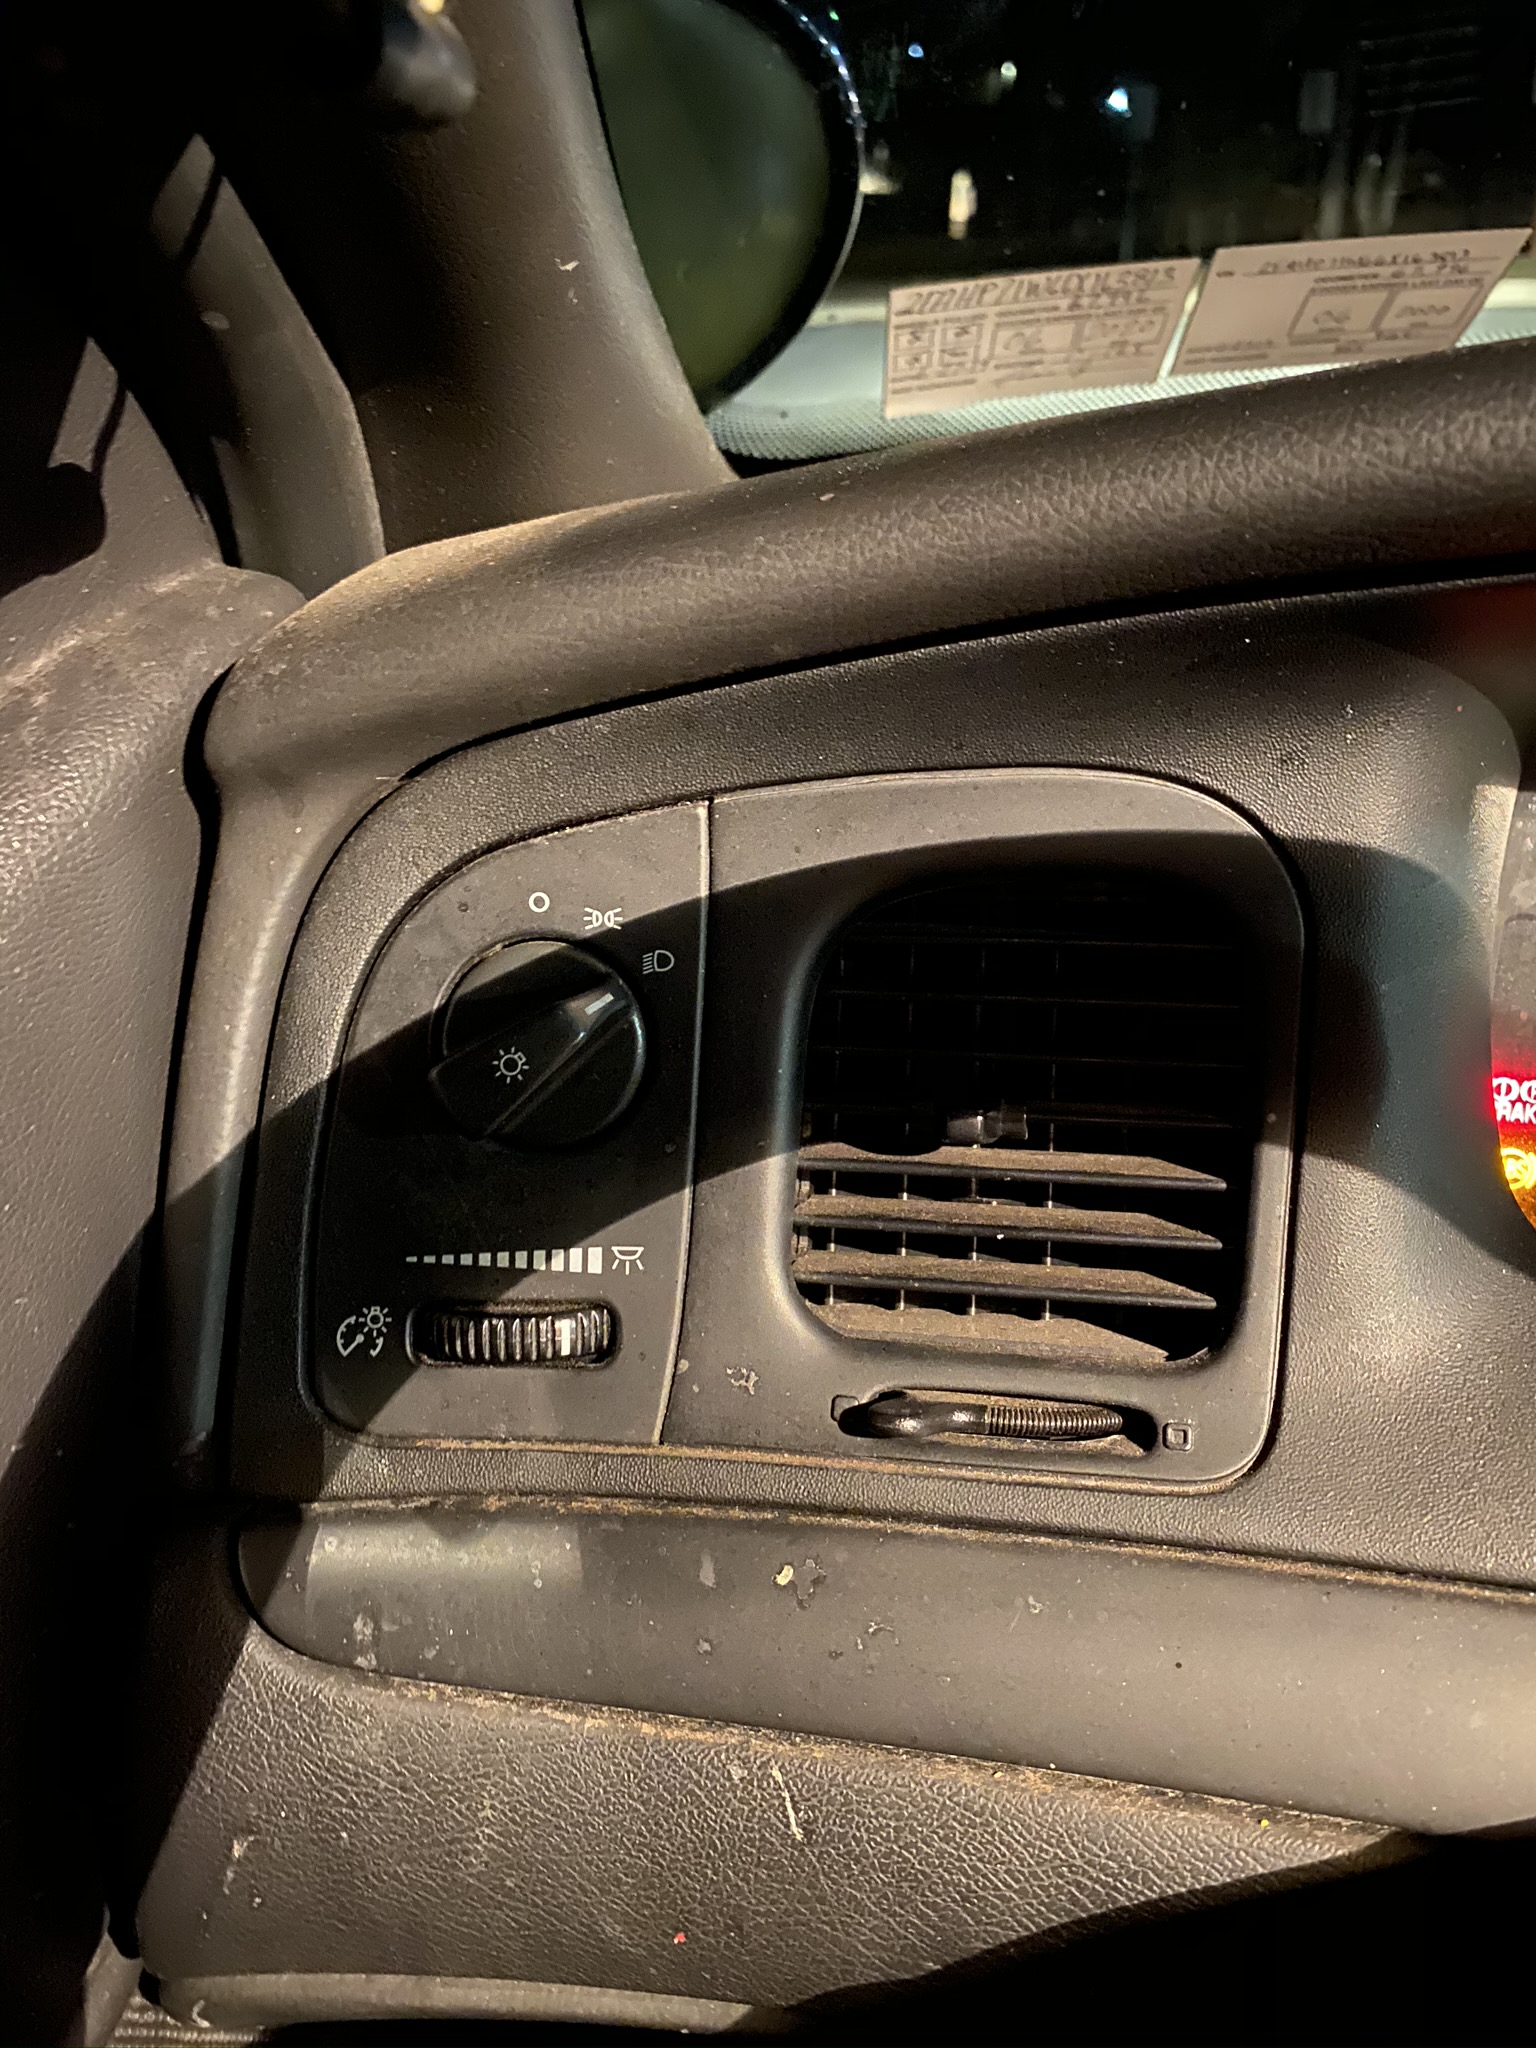
Headlights
On the far most left hand side of the instrument panel, you'll see the switch to turn the headlights on/off. These should be turned on at all times for visibility, and please remember to turn them off when you are done.
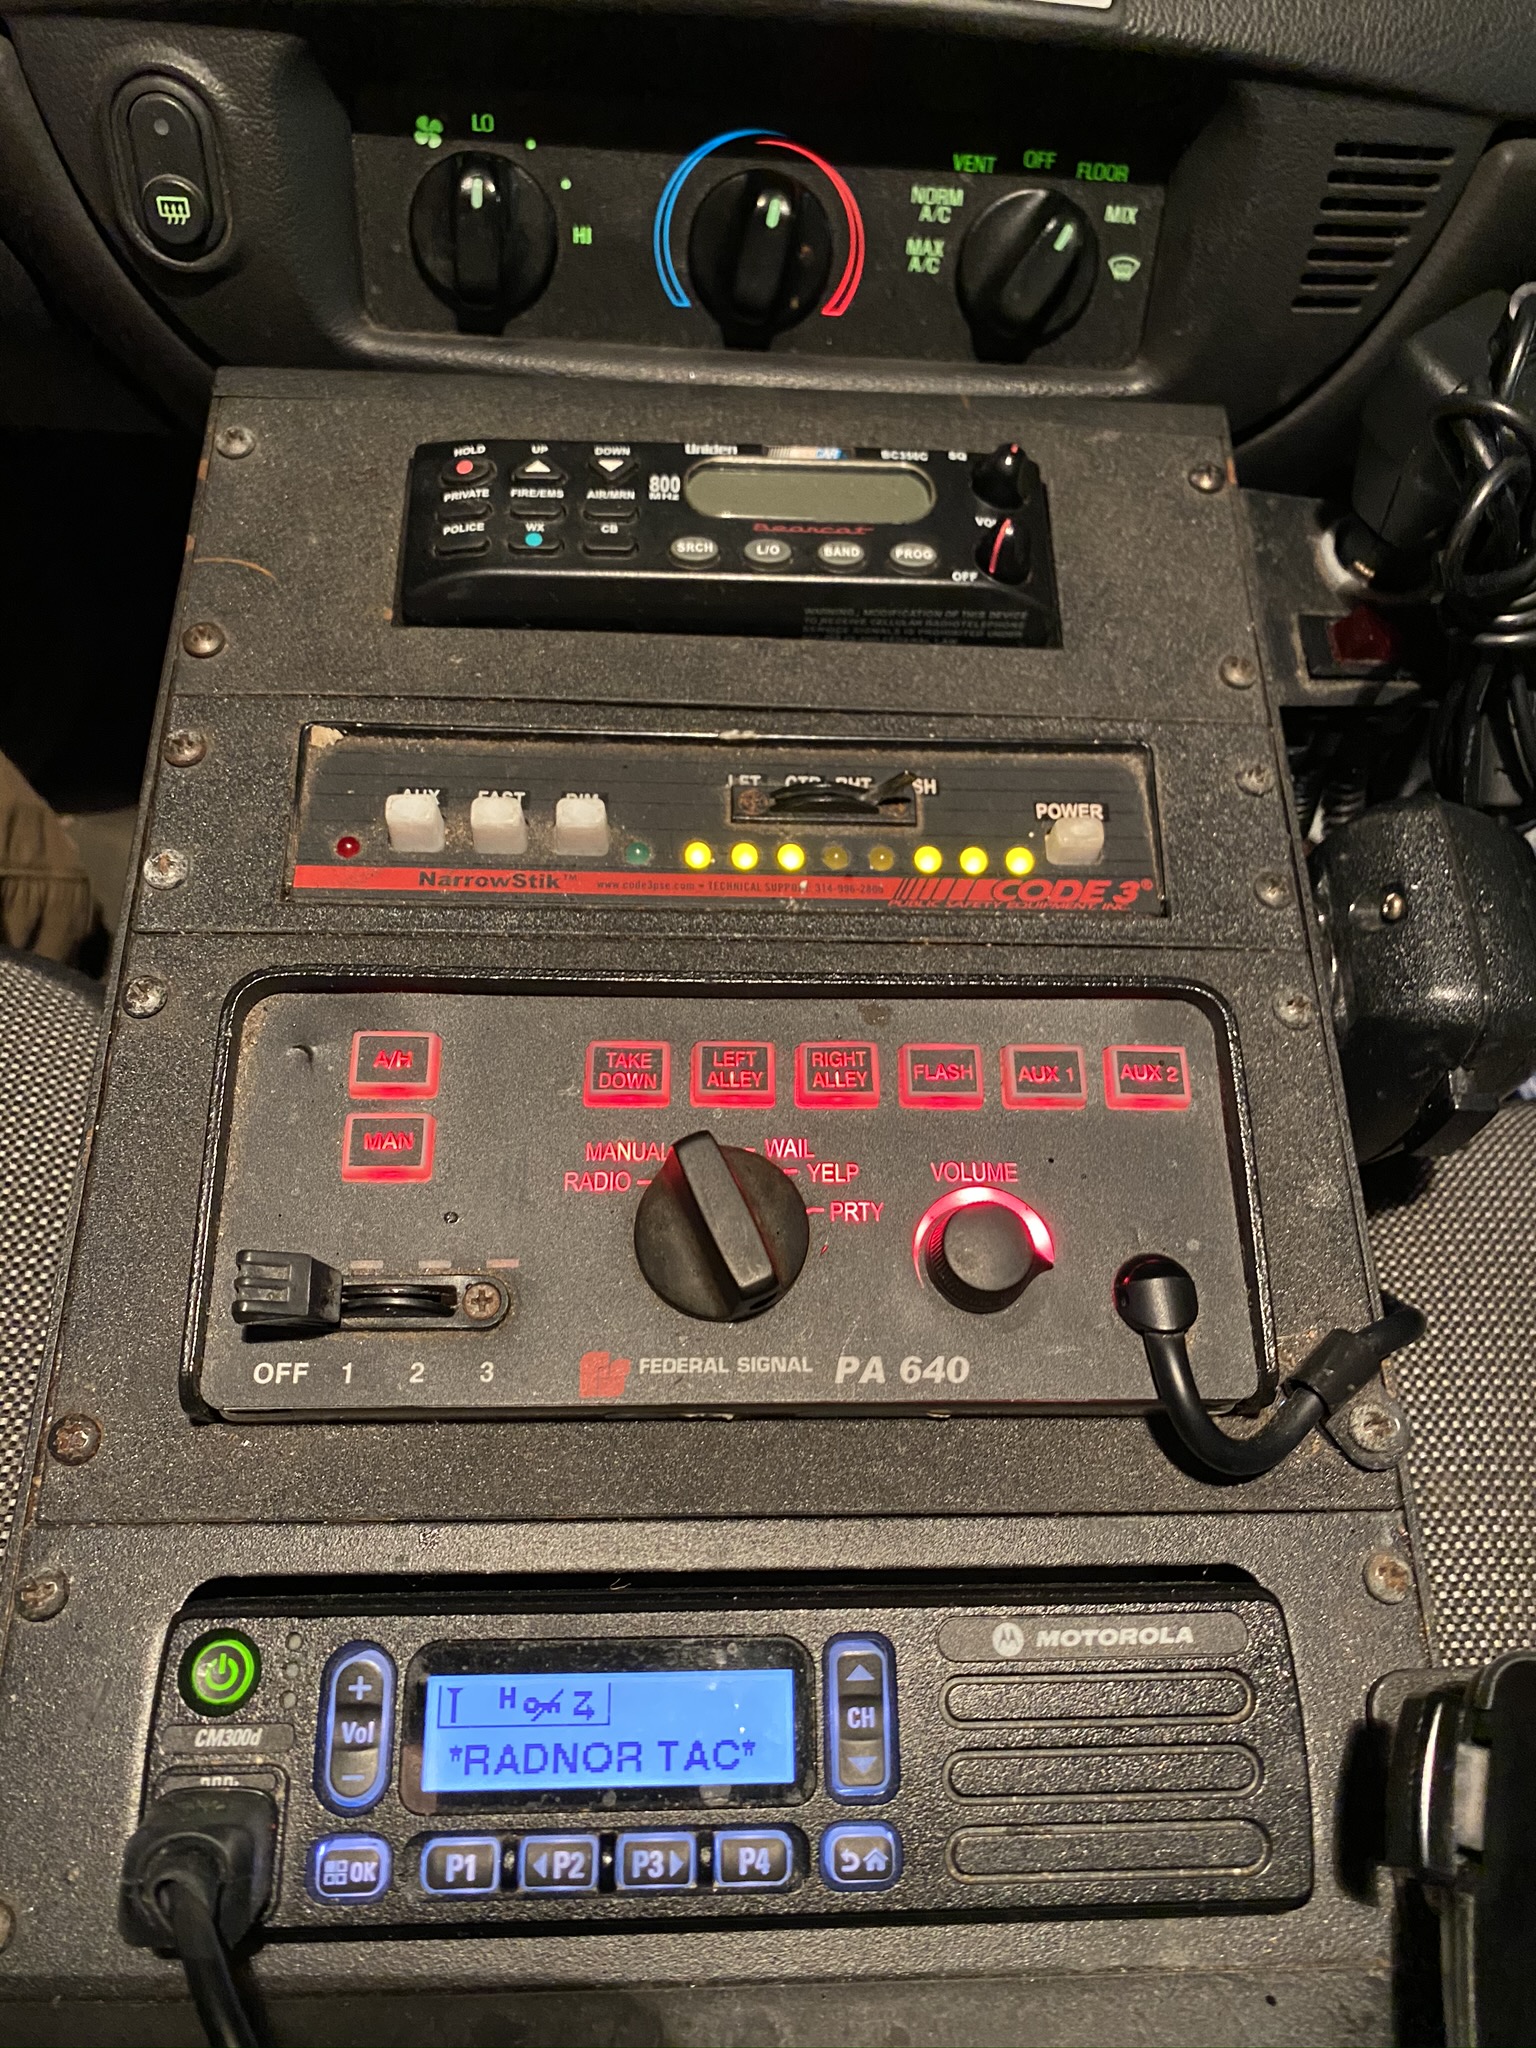
Control Panel
The control panel is located in the center console of the vehicle.
The 4 installed units from top to bottom are:
- Radio scanner.
- Rear window traffic advisor lights.
- Overhead amber/white lights. The siren/public address part of this unit is disabled.
- 2-Way mobile radio unit.
Control Panel Console Image
Radio Scanner
The scanner can be turned on/off and volume adjusted using the knob located on the lower right hand side of the unit. This is typically left off, but could be used to scan public police frequencies if needed. The scope of operation is beyond this quick how-to.
Radio Scanner Image
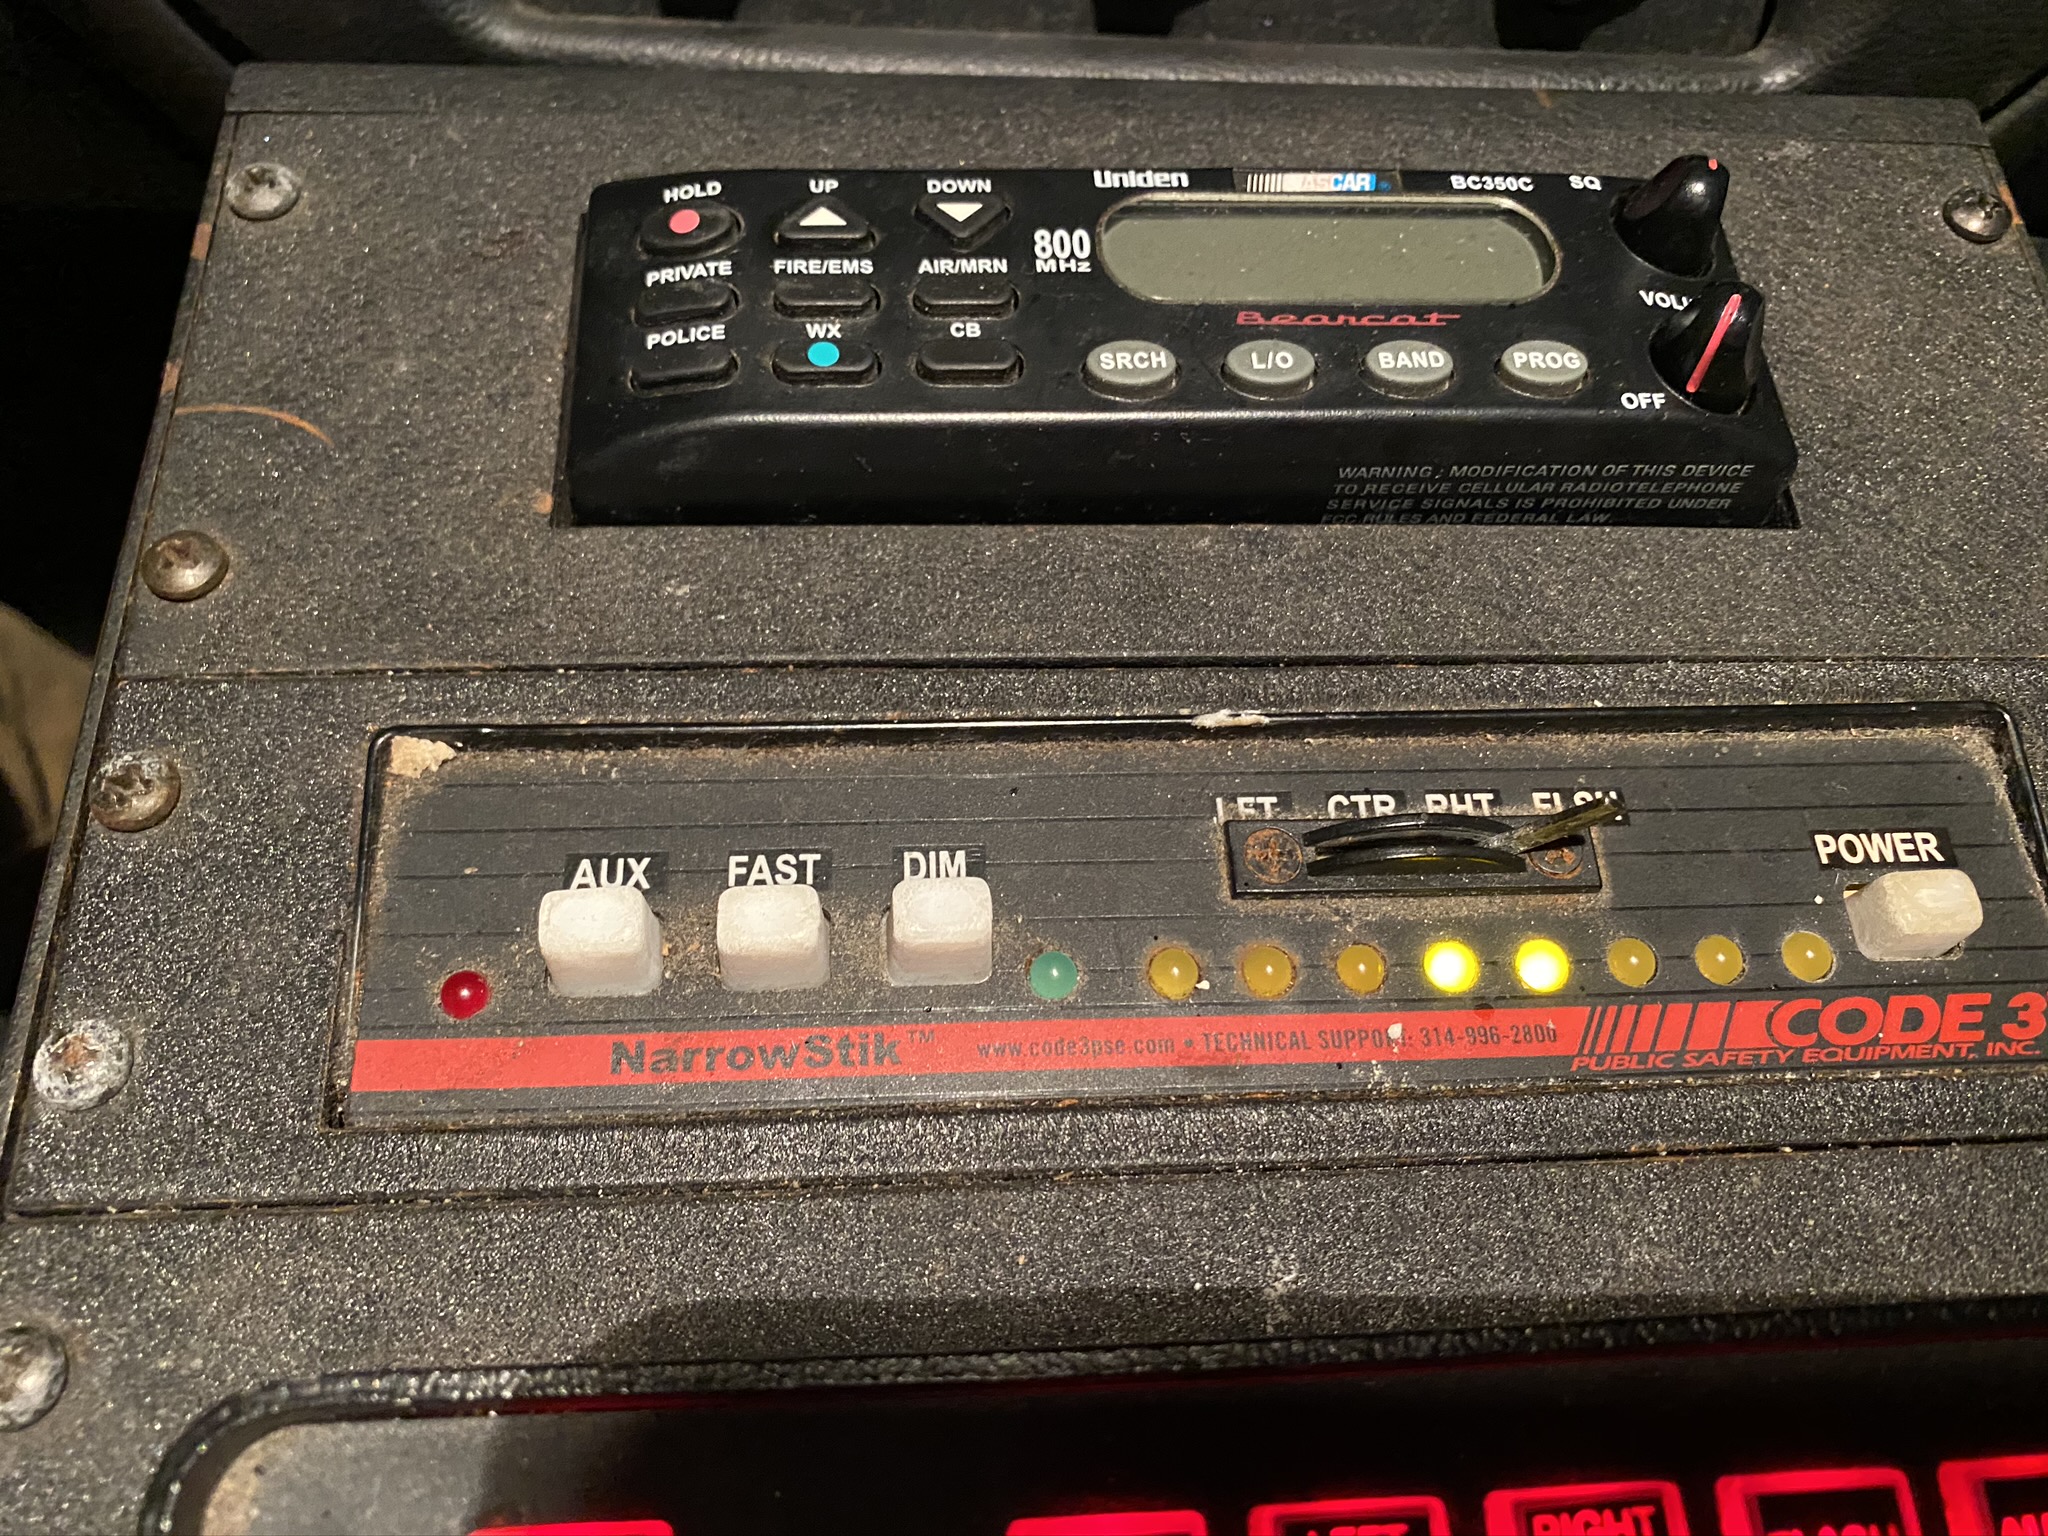
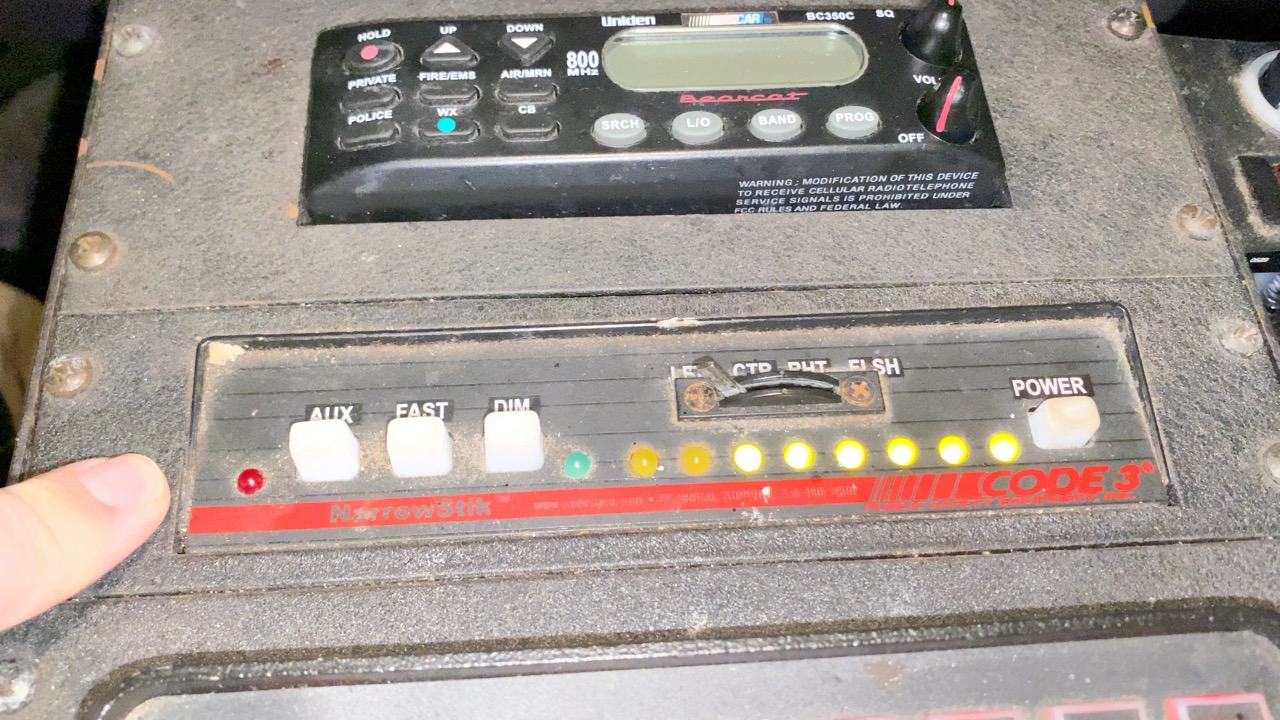
Rear Traffic Advisor Lights
Below the scanner is the control unit for the rear window traffic advisor lights. All the way on the right hand side is the main power button, press this to turn the lights on and back off again.
In the center are amber lights which indicate the pattern which is flashing out of the rear window.
There are 4 settings, which are selected using the switch above the pattern indicator lights. The settings are:
- LFT - Have the lights flash towards the left (driver's) side, to indicate you are stopped and traffic should pass you to the left.
- CTR - Have the lights flash from the center out to both sides, to indicate you are stopped in the center of a roadway and traffic should pass to the left and right.
- RHT - Have the lights flash towards the right (passenger's) side, to indicate you are stopped and traffic should pass you to the right.
- FSH - Have the lights flash in/out, to indicate you are traveling slowly and that traffic behind you should prepare to slow down. This is the mode you should use while driving at a speed slower than the posted speed limit.
Rear Traffic Advisor Unit Image
Rear Traffic Advisor Video
 01f3b3f214158ec78bb3a09bab9e86d6c864800971.mp4
Overhead Lights
Below the control unit for the traffic advisor, is the control unit for the overhead lights. There is also a siren control and public address microphone, which have all been disabled.
Overhead Control Unit Image
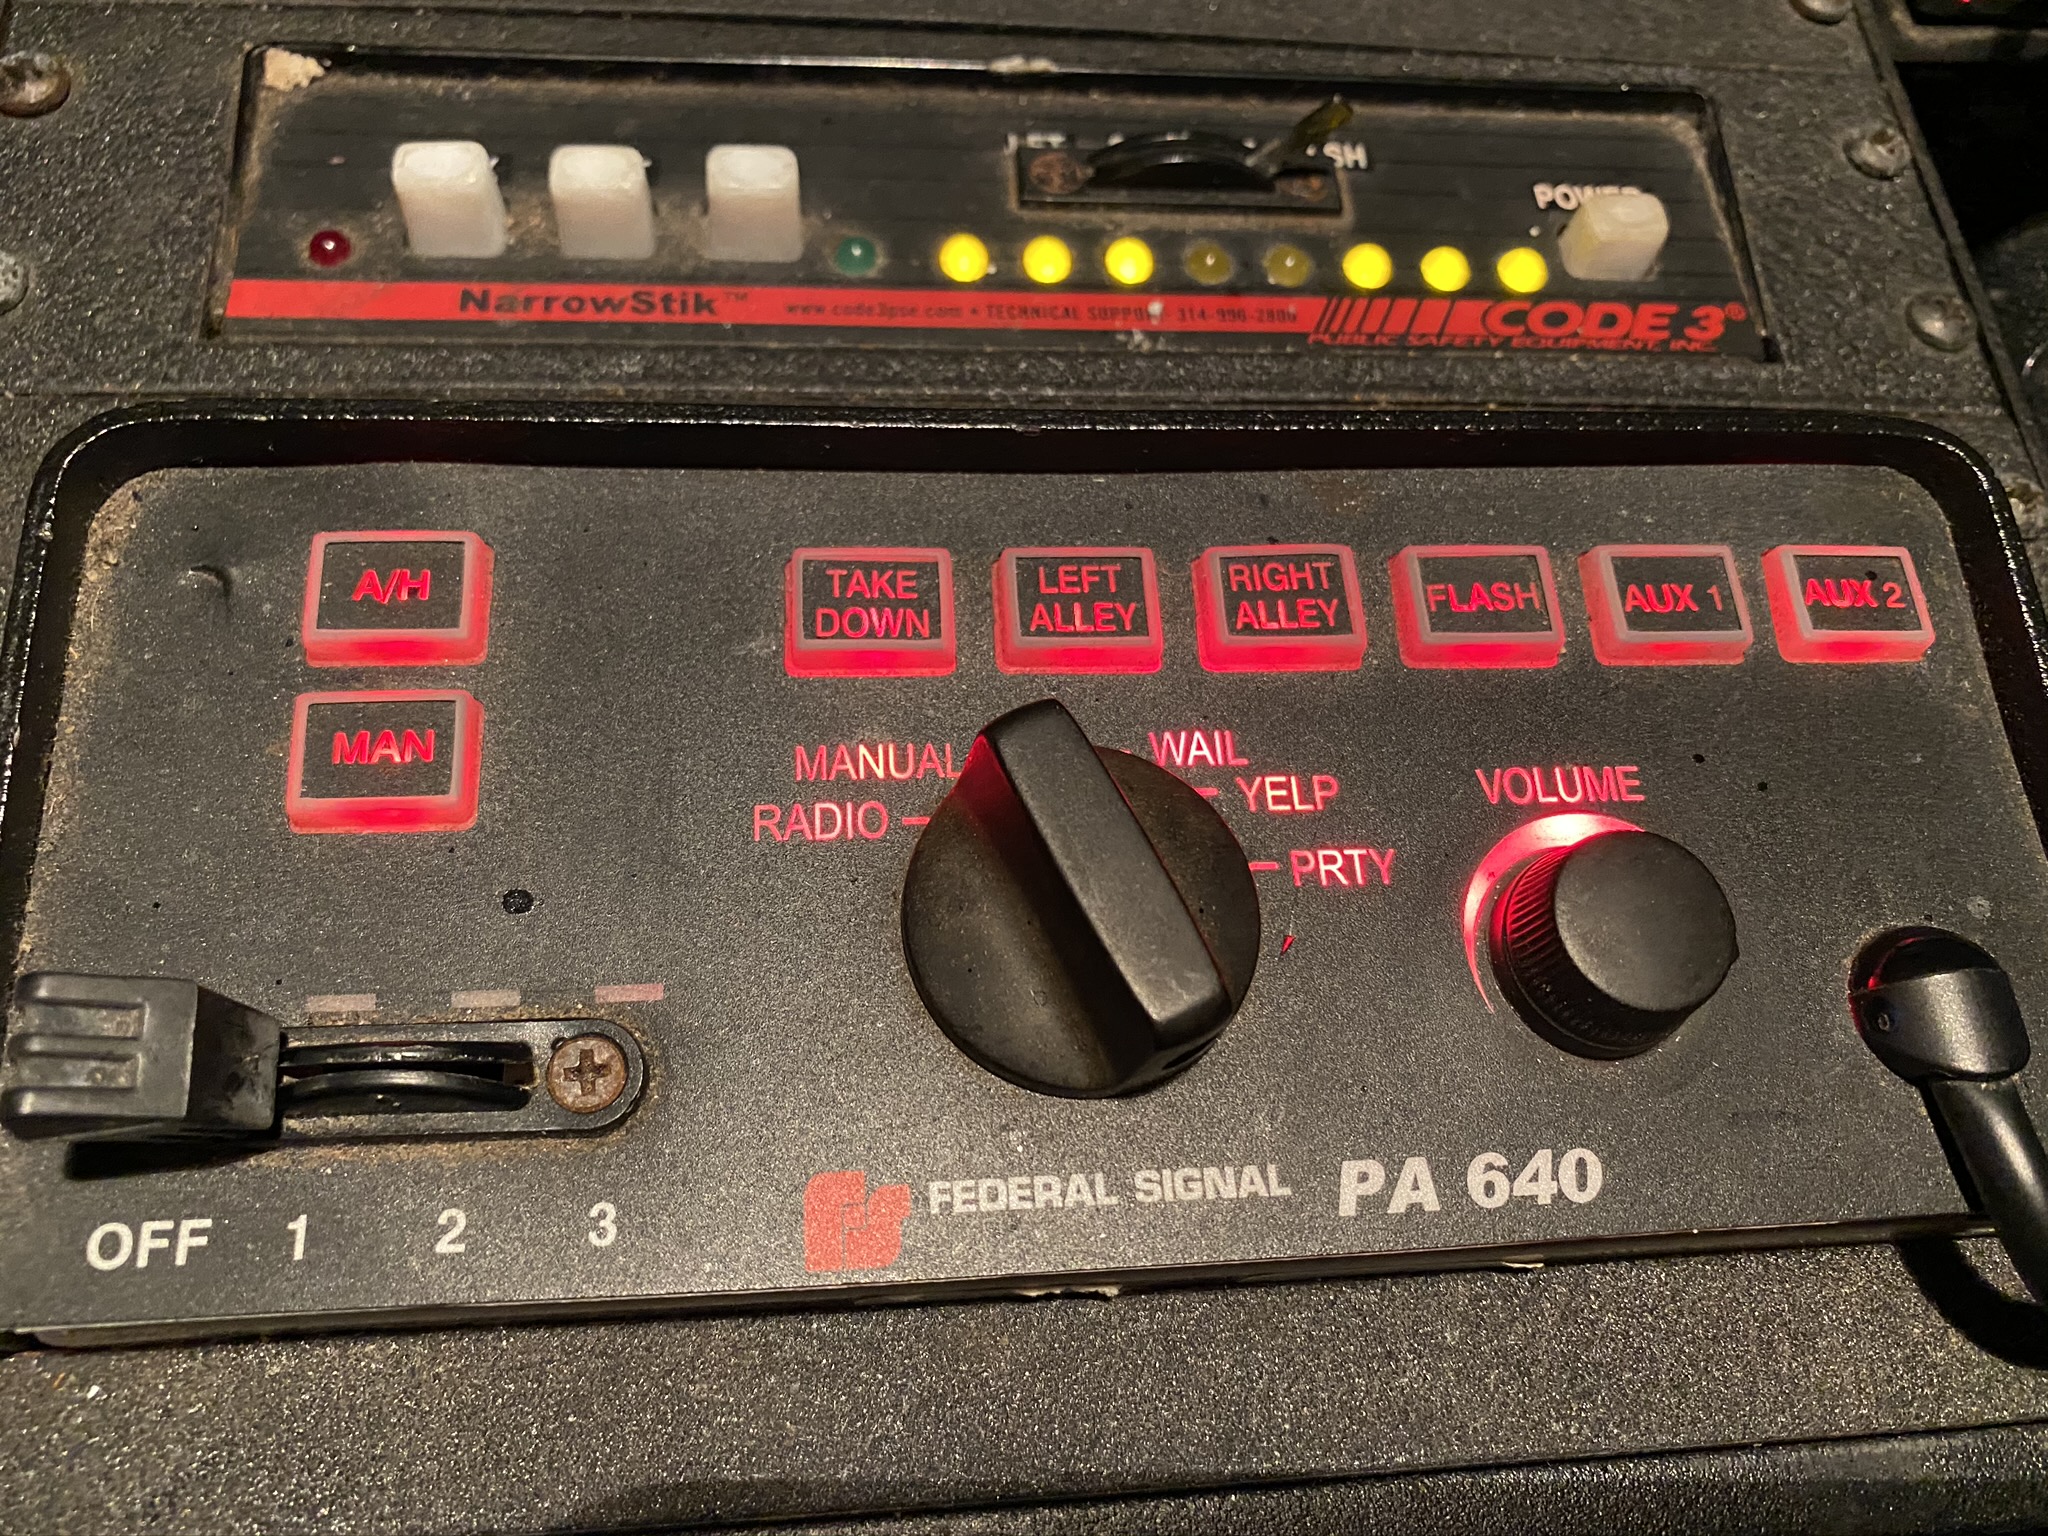
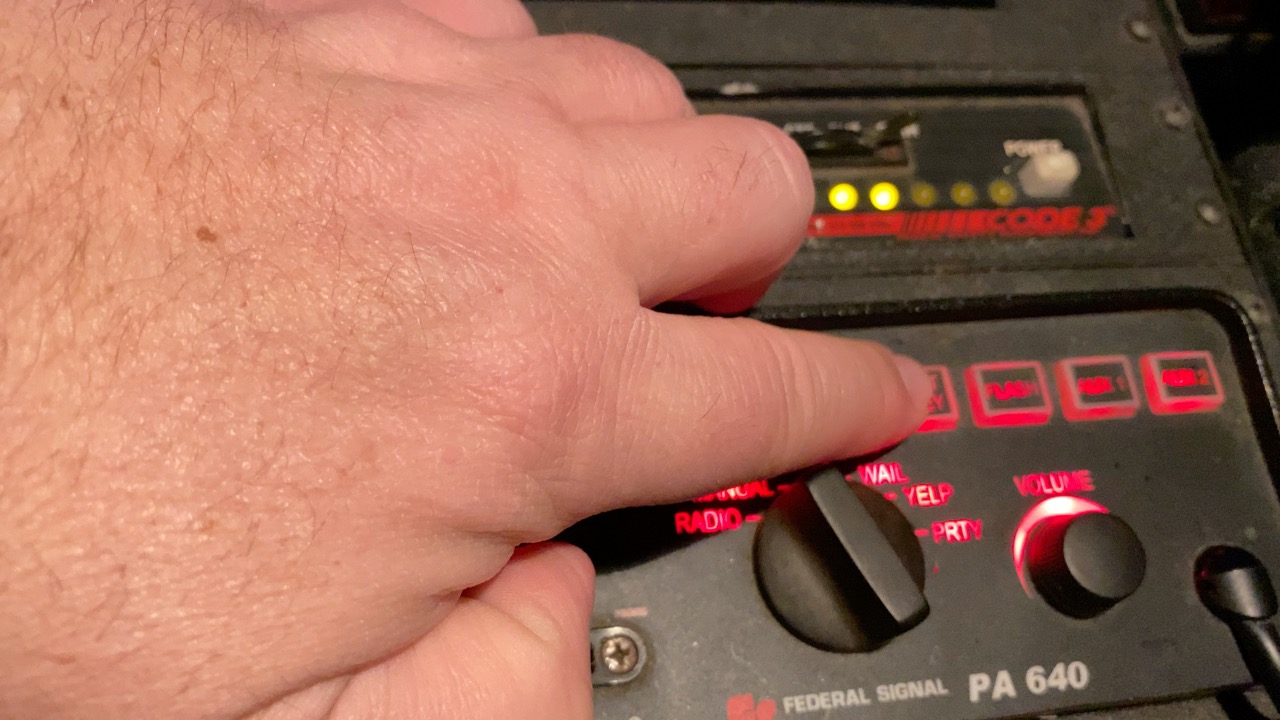
Left Alley
To operate the left (driver's) side alley light, press the "RIGHT ALLEY" (labeled incorrectly) button. Press this to toggle between turning the light on and back off again. Do not use this or leave it on while driving. Use only to better see dark areas when patrolling through a neighborhood.
Left Alley Light Image
Left Alley Light Video
01036e92452c3264844b50de897202e7b8a889a745.mp4
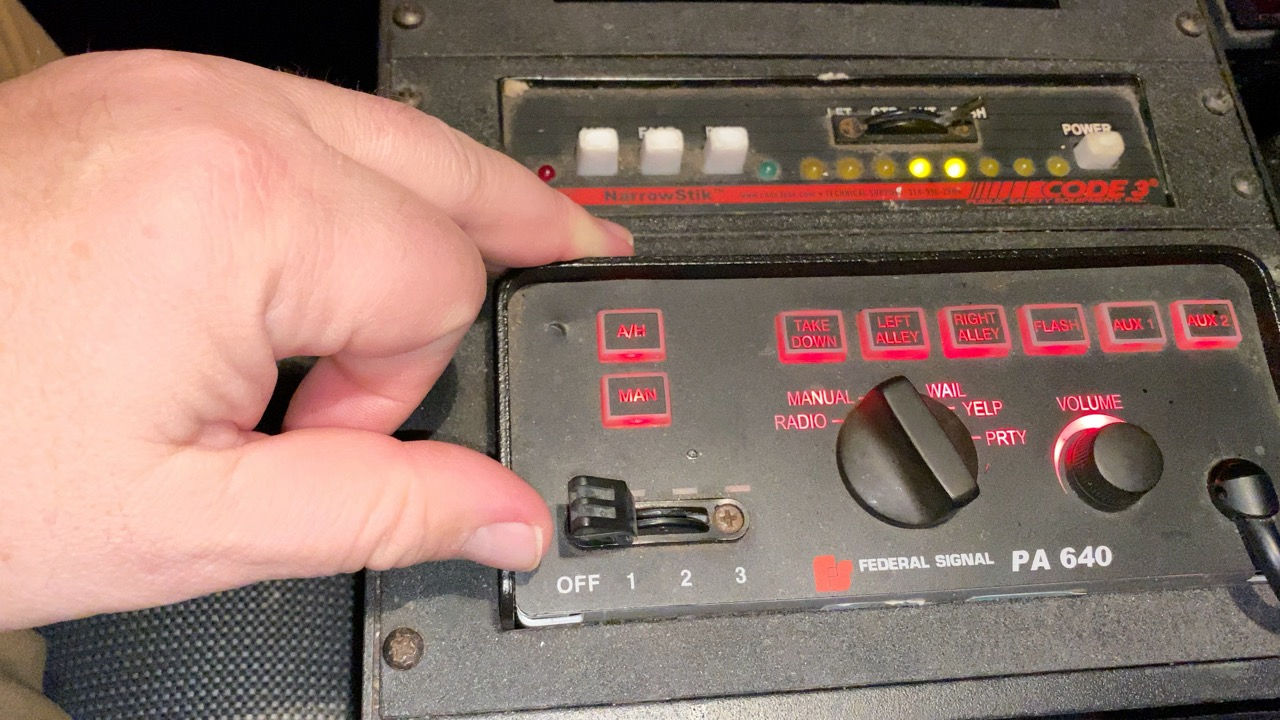
Right Alley
To operate the right (passenger's) side alley light, move the slide switch on the lower left of the unit into the "1" position. Do not use this or leave it on while driving. Use only to better see dark areas when patrolling through a neighborhood. This will also activate the flashing rear lights on the vehicle as well.
Right Alley Light Image
Right Alley Light Video
01691115c1320b5739e9d574376d6191cc6bc1546e.mp4
Overhead Lights
To enable all of the vehicle's flashing lights (front/rear/top), push the control knob at the bottom left of the control unit all the way over into position 2/3. The overhead lights are typically only used when you are stopped and directing traffic at an event. Do not use this or leave it on while driving.
Overhead Unit Image
Overhead Lights Video
01afd1f919f4cfb3aa7d5caccb1e21fff052efb2e0.mp4
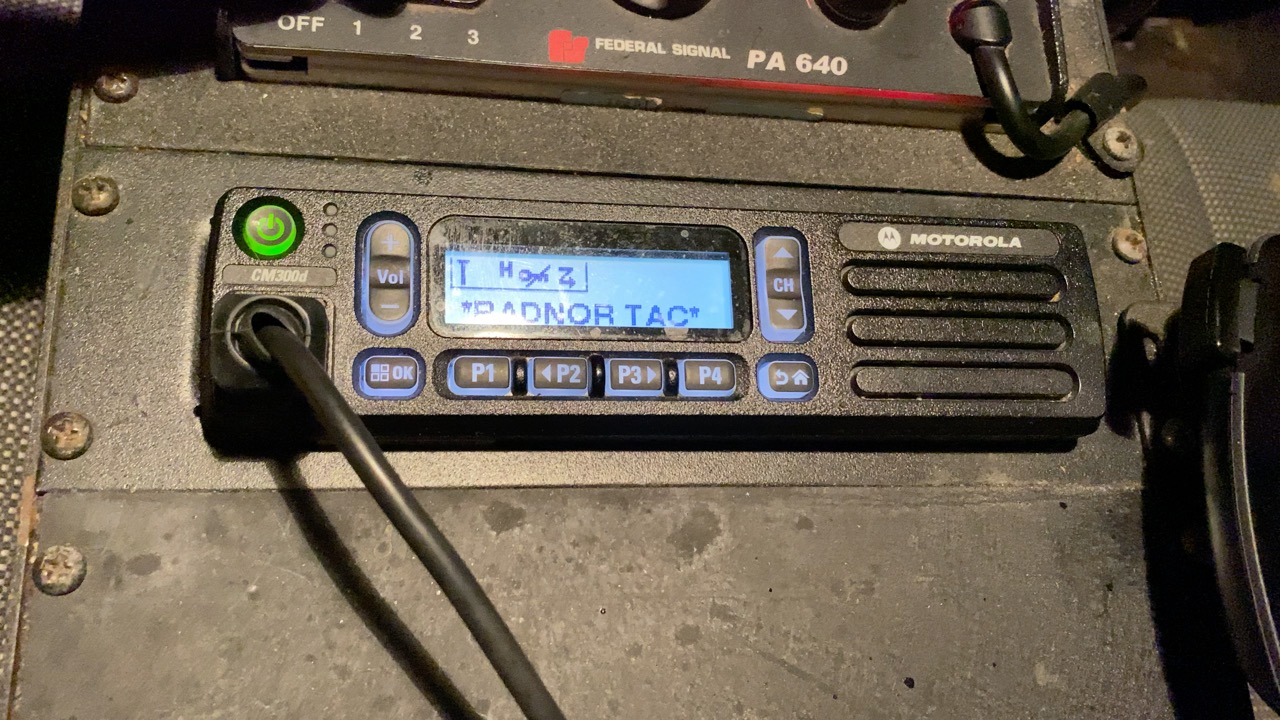
2-Way Radio
The 2-Way radio should be automatically turned on when you start the vehicle. If not, there is a power button at the top left of the unit. It should also be on "*RADNOR TAC*" as the station. If not, you can use the channel up/down buttons to scroll through the programmed channels until you get to this one. Make sure the volume is turned up to about 50-75% of the total, and you can adjust this from there if it is too loud or quiet.
The radio will automatically receive transmissions over the channel you are on.
To transmit, pick up the microphone out of the holder, place about 2-3 inches from your face, and press/hold down the transmit button. While holding the button down, wait for 1-2 seconds. This allows for the repeater at the township building to pick up your transmission and start repeating that signal to all of the other radios. This also allows those that are scanning multiple channels to tune into the Radnor Tactical channel to receive.
Talk across the microphone, not directly into it. Your mouth should be at least a couple inches away, but not too far, from the microphone.
Please see the Radio Use page for more details on radio use.
2-Way Radio Image